In today’s fast-paced digital world, a reliable and responsive computer mouse is an essential tool for smooth navigation and efficient productivity. And when it comes to a trusted brand in the realm of technology, Dell stands tall. But what happens when you’re faced with the task of connecting your Dell mouse to your laptop? Fear not, for in this comprehensive guide, we will walk you through the step-by-step process of connecting your Dell mouse to your laptop, ensuring a seamless and hassle-free experience.
Whether you’re a tech-savvy professional or a casual user, understanding how to connect your Dell mouse to your laptop is crucial for maximizing your device’s potential. With the myriad of options and configurations available, it’s easy to feel overwhelmed. However, armed with the right knowledge and guidance, you’ll be able to effortlessly establish a connection that unlocks a world of convenience and precision. So, join us as we dive into the intricacies of connecting your Dell mouse to your laptop and discover the power of seamless navigation at your fingertips.
- Insert the USB receiver into an available USB port on your laptop.
- Turn on the mouse by flipping the switch on the bottom.
- Wait for your laptop to recognize the new device and install any necessary drivers.
- Your Dell mouse is now connected and ready to use.
Connecting a Dell Mouse to a Laptop: Step-by-Step Guide
In this article, we will guide you through the process of connecting a Dell mouse to your laptop. Whether you are using a wired or wireless Dell mouse, the steps are relatively simple and can be completed in just a few minutes. Follow the instructions below to ensure a successful connection.
Step 1: Check Compatibility
Before attempting to connect your Dell mouse to your laptop, it is important to ensure compatibility. Ensure that your Dell mouse is designed to work with your specific laptop model and operating system. This information can usually be found in the user manual or on the Dell website. Using an incompatible mouse may result in connectivity issues or limited functionality.
If you are unsure about compatibility, you can also contact Dell customer support for assistance. They will be able to provide you with the necessary information and guide you through the process.
Step 2: Prepare the Mouse
If you are using a wired Dell mouse, simply plug the USB connector into an available USB port on your laptop. Your laptop should automatically detect the mouse and install any necessary drivers. Once the installation is complete, you can begin using the mouse immediately.
If you are using a wireless Dell mouse, you will need to prepare it for connection. Open the battery compartment on the bottom of the mouse and insert the required batteries. Make sure to follow the correct polarity indicated by the markings inside the compartment. Once the batteries are inserted, close the compartment.
Step 3: Connect the Mouse
If you are using a wired Dell mouse, there is no additional step required. Your laptop should already recognize the mouse and it should start working right away.
If you are using a wireless Dell mouse, you will need to connect it to your laptop. Locate the power switch on the bottom of the mouse and turn it on. Next, locate the receiver, which is a small USB dongle that came with the mouse. Insert the receiver into an available USB port on your laptop.
Your laptop should automatically detect the wireless mouse and install any necessary drivers. Once the installation is complete, your mouse should be ready for use. If your mouse does not connect automatically, you may need to press the connect button on the receiver and the mouse to establish a connection.
Step 4: Troubleshooting
If you encounter any issues during the connection process, there are a few troubleshooting steps you can try. First, ensure that the batteries in your wireless mouse are correctly inserted and have enough power. If the batteries are low, replace them with fresh ones.
If your wired mouse is not working, try connecting it to a different USB port on your laptop. Sometimes, certain USB ports may have issues, and switching to a different one can resolve the problem.
If you have followed all the steps and your mouse still does not work, it is recommended to contact Dell customer support for further assistance. They will be able to troubleshoot the issue and provide you with the necessary solutions.
Frequently Asked Questions
Here are some commonly asked questions about how to connect a Dell mouse to a laptop.
Q: How do I connect a Dell mouse to my laptop?
To connect a Dell mouse to a laptop, follow these steps:
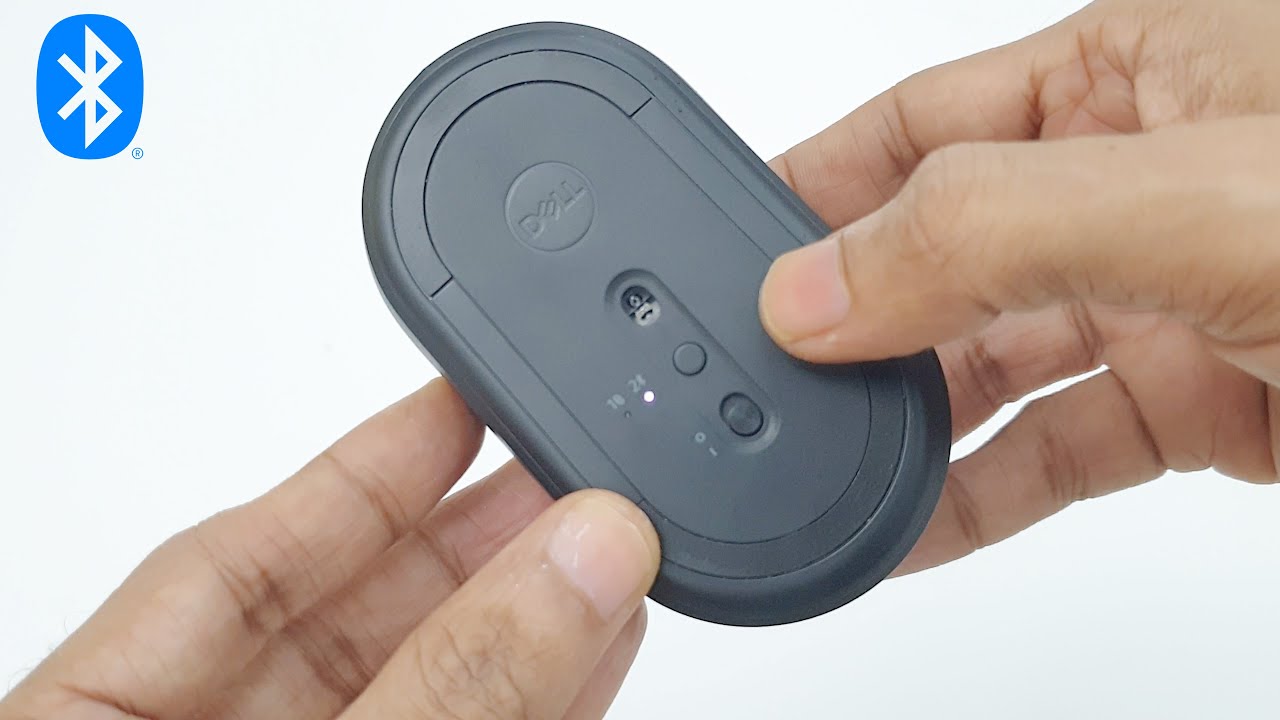
1. Start by turning on your laptop and ensuring that the Bluetooth feature is enabled.
2. Next, turn on your Dell mouse and put it in pairing mode. This is usually done by pressing and holding the Bluetooth button on the bottom of the mouse until the LED light starts flashing.
3. On your laptop, go to the Bluetooth settings and search for available devices.
4. Once you see your Dell mouse listed, click on it to begin the pairing process.
5. Follow any on-screen prompts to complete the pairing process. Once connected, your Dell mouse should be ready to use with your laptop.
Q: Can I connect a Dell mouse to my laptop using a USB cable?
Yes, you can connect a Dell mouse to your laptop using a USB cable. Most Dell mice come with a USB connector that can be plugged into a USB port on your laptop.
Simply locate an available USB port on your laptop and insert the USB connector from the Dell mouse. Your laptop should automatically detect the mouse and install any necessary drivers. Once connected, you can start using the Dell mouse right away.
Q: My Dell mouse is not connecting to my laptop. What should I do?
If your Dell mouse is not connecting to your laptop, there are a few troubleshooting steps you can try:
1. Make sure the mouse is turned on and in pairing mode. Check the user manual for instructions on how to do this.
2. Restart your laptop and try connecting the mouse again.
3. Ensure that the Bluetooth feature on your laptop is enabled and functioning properly.
4. Try connecting the mouse to a different laptop or device to see if the issue is with the mouse itself.
If none of these steps work, you may need to contact Dell customer support for further assistance.
Q: Can I use a Dell mouse with a non-Dell laptop?
Yes, you can use a Dell mouse with a non-Dell laptop. Dell mice are designed to be compatible with a wide range of devices, including laptops from other manufacturers.
To connect a Dell mouse to a non-Dell laptop, simply follow the same steps outlined earlier for connecting the mouse via Bluetooth or USB cable. Your laptop should recognize the Dell mouse and allow you to use it without any issues.
Q: Do I need to install any drivers for my Dell mouse to work with my laptop?
In most cases, you do not need to install any drivers for a Dell mouse to work with your laptop. Modern operating systems, such as Windows and macOS, usually have built-in drivers that support a wide range of mouse models, including Dell mice.
However, if you encounter any compatibility issues or specific features of your Dell mouse are not working as expected, you may need to visit the Dell website and download the appropriate drivers for your mouse model. Follow the instructions provided by Dell to install the drivers on your laptop.
In conclusion, learning how to connect a Dell mouse to a laptop is a simple yet essential skill for anyone who values efficiency and convenience in their daily tasks. By following the step-by-step instructions provided in this guide, you can quickly establish a seamless connection between your Dell mouse and laptop, enhancing your productivity and overall computing experience.
Remember, the key to successfully connecting your Dell mouse to your laptop lies in understanding the specific requirements and compatibility of your devices. By checking for the necessary drivers, ensuring your laptop’s Bluetooth or USB ports are functional, and following the correct pairing procedure, you can effortlessly establish a reliable connection. So, whether you’re a student, professional, or simply a technology enthusiast, mastering this process will undoubtedly streamline your workflow and elevate your computing capabilities. Embrace the ease and convenience of a connected Dell mouse today, and unlock a world of possibilities at your fingertips.

