Are you tired of struggling with a missing mouse on your Chromebook? Fret not, as we bring you the ultimate guide on how to get your mouse back on track. Navigating your Chromebook without a functional mouse can be frustrating, hindering your productivity and causing unnecessary delays. However, with a few simple steps and troubleshooting techniques, you can swiftly resolve this issue and regain control of your cursor in no time.
As Chromebooks rely heavily on touchpad functionality, a non-responsive or missing mouse can be a cause for concern. Whether you’re a student, professional, or casual user, a malfunctioning mouse can disrupt your workflow and make even the simplest tasks seem more challenging. In this comprehensive guide, we will walk you through various methods to troubleshoot and restore your mouse’s functionality on your Chromebook. From checking your settings to updating drivers, we’ll cover all the necessary steps to ensure a seamless browsing experience. So, let’s dive in and learn how to reclaim your mouse and navigate your Chromebook with ease once again.
How to get mouse back on Chromebook:
- Click on the “Settings” icon in the bottom right corner of your screen.
- Select “Accessibility” from the menu.
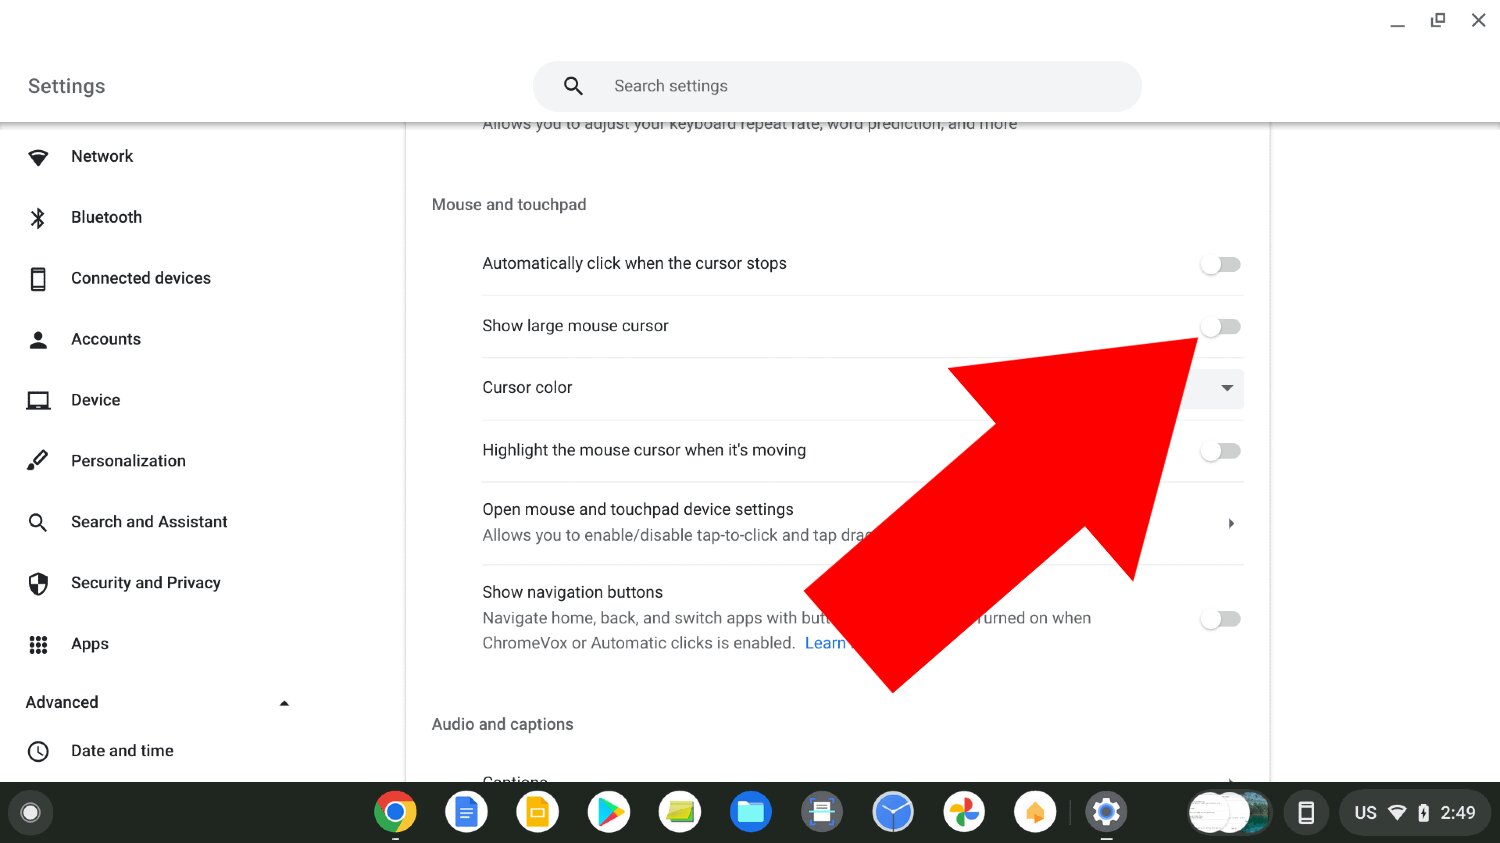
- Under the “Mouse and touchpad” section, toggle the switch for “Mouse” to turn it on.
- If the mouse still doesn’t appear, try connecting an external mouse to your Chromebook.
How to Get Mouse Back on Chromebook
Chromebooks are known for their simplicity and ease of use. However, sometimes you may encounter issues with your mouse not working properly. Whether it’s a frozen cursor or a completely unresponsive mouse, this guide will walk you through the necessary steps to get your mouse back on track.
Step 1: Check Mouse Connection
Before diving into any troubleshooting steps, it’s essential to ensure that your mouse is properly connected to your Chromebook. If you’re using a wired mouse, make sure the USB cable is securely plugged into the appropriate port. If you’re using a wireless mouse, check that the batteries have enough charge and that the mouse is turned on. Sometimes a loose connection or drained batteries can cause mouse issues.
If everything seems to be in order, try disconnecting and reconnecting the mouse to see if that resolves the problem. If you’re using a wireless mouse, you may also want to try pairing it again with your Chromebook.
Step 2: Restart Your Chromebook
When encountering any technical issues, a simple restart can often do wonders. To restart your Chromebook, click on the system tray in the bottom-right corner of the screen, then click on the power icon. From the drop-down menu, select “Restart.” Wait for your Chromebook to shut down and boot up again. Once it’s back on, check if the mouse is functioning correctly.
If the mouse still isn’t working after restarting, proceed to the next step.
Step 3: Adjust Mouse Settings
Chromebooks offer various mouse settings that can be customized to suit your preferences. To access these settings, click on the system tray in the bottom-right corner of the screen, then click on the gear icon to open the settings menu. From there, select “Devices” and then “Mouse and touchpad.”
In the Mouse and touchpad settings, you can adjust options such as mouse speed, scrolling behavior, and button configuration. Experiment with different settings to see if any changes resolve the mouse issue you’re experiencing.
Step 4: Update Chrome OS
Outdated software can sometimes cause compatibility issues, including problems with your mouse. To ensure your Chromebook is running the latest version of Chrome OS, click on the system tray, then click on the gear icon to open the settings menu. From there, select “About Chrome OS” and then “Check for updates.”
If any updates are available, follow the on-screen instructions to download and install them. After the update is complete, restart your Chromebook and check if the mouse is now working properly.
Step 5: Contact Support
If none of the previous steps have resolved your mouse issue, it may be time to reach out for further assistance. Contact the Chromebook manufacturer’s support or visit their website for troubleshooting guides specific to your device. They will be able to provide you with more advanced solutions or arrange for repairs if necessary.
Step 6: Consider External Options
If all else fails, you may want to consider using an external mouse with your Chromebook. This can be either a wired or wireless mouse, depending on your preference. Simply connect the mouse to your Chromebook and ensure it is properly recognized. Using an external mouse can provide a temporary solution while you work on resolving the issues with your built-in mouse.
Step 7: Practice Patience
Technical issues can be frustrating, but it’s essential to remain patient throughout the troubleshooting process. Take your time to go through each step carefully, and don’t hesitate to seek assistance when needed. With a little perseverance, you’ll hopefully get your mouse back on your Chromebook in no time.
Frequently Asked Questions
Here are some common questions and answers about how to get the mouse back on a Chromebook:
1. How do I troubleshoot a missing mouse cursor on my Chromebook?
If your mouse cursor is missing on your Chromebook, try these troubleshooting steps:
First, press the Esc key on your keyboard to exit full-screen mode. Sometimes, the cursor may disappear when in full-screen mode.
If that doesn’t work, try pressing the Search key (usually denoted by a magnifying glass or a circle with dots) and then start typing “mouse settings.” Click on the “Mouse settings” option that appears, and make sure the cursor speed is not set to the lowest setting. Adjusting the cursor speed may bring it back on the screen.
2. Why is my touchpad not working on my Chromebook?
If your touchpad is not working on your Chromebook, follow these steps to troubleshoot:
First, make sure your Chromebook is up to date by clicking on the time in the bottom-right corner of the screen, selecting the gear icon for “Settings,” and then clicking on “About Chrome OS.” Click on “Check for updates” and let your Chromebook update if any updates are available. Restart your Chromebook after the update.
If the touchpad still doesn’t work, try pressing the Search key and then typing “touchpad settings.” Click on the “Touchpad settings” option that appears and make sure the touchpad is enabled. If it’s already enabled, try disabling and re-enabling it to see if that resolves the issue.
3. Can I use a USB mouse with my Chromebook?
Yes, you can use a USB mouse with your Chromebook. Simply connect the USB mouse to one of the USB ports on your Chromebook, and it should work automatically without the need for any additional setup or installation.
If the USB mouse is not working, try connecting it to a different USB port or try using a different USB mouse to determine if the issue is with the mouse or the USB port.
4. How do I reset the mouse settings on my Chromebook?
If you want to reset the mouse settings on your Chromebook, follow these steps:
First, click on the time in the bottom-right corner of the screen, select the gear icon for “Settings,” and then click on “Mouse settings.” In the “Mouse settings” window, scroll down to the “Reset mouse settings” section and click on the “Reset” button. Confirm the reset by clicking “Reset” again in the pop-up window.
After resetting the mouse settings, your Chromebook will revert to the default mouse settings. You can then customize the settings according to your preference.
5. Why is my external mouse not working on my Chromebook?
If your external mouse is not working on your Chromebook, try these troubleshooting steps:
First, check if the mouse is properly connected to the USB port or wireless receiver. Ensure that the mouse’s batteries, if applicable, are not drained and are inserted correctly.
If the mouse is connected correctly and the batteries are fine, try connecting the mouse to a different USB port or restart your Chromebook. Sometimes, a simple restart can resolve connectivity issues.
Mouse Cursor Freezing, Slow, Disappearing On Chromebook FIX [Tutorial]
In conclusion, regaining control of your mouse on a Chromebook is a relatively simple process that can be accomplished in just a few steps. By following the troubleshooting methods discussed in this article, you can easily overcome any issues you may encounter with your mouse. Remember to start by checking the physical connection of your mouse and ensure that it is securely plugged into the USB port. If that doesn’t solve the problem, try rebooting your Chromebook or disconnecting and reconnecting the mouse. Lastly, if all else fails, you can try adjusting the mouse settings in the Chromebook’s system preferences. With these techniques in mind, you can quickly resolve any mouse-related issues on your Chromebook and get back to browsing and navigating effortlessly.
In conclusion, it is important to note that the Chromebook’s mouse functionality is essential for smooth and efficient navigation. If you find yourself facing issues with the mouse, there are several troubleshooting methods you can try to regain control. By following the steps outlined in this article, you can easily troubleshoot and fix any mouse-related problems on your Chromebook. Remember to check the physical connection, reboot the device, and adjust the mouse settings if necessary. With these strategies at your disposal, you can quickly resolve any mouse-related issues and continue to enjoy a seamless browsing experience on your Chromebook.

