Are you tired of your mouse dying on you at the most inconvenient times? Frustrated by the constant need for battery changes? Well, fear not! In this guide, we will walk you through the step-by-step process of changing the battery in your mouse, ensuring that you never have to face a dead mouse again. Whether you’re a tech enthusiast or a novice in need of some guidance, this comprehensive tutorial will equip you with the knowledge and skills to tackle this task with ease.
In today’s digital world, the mouse has become an essential tool for navigating through our daily tasks. However, many of us often overlook the importance of maintaining its battery life. By learning how to change the battery in your mouse, you will not only save yourself from the frustration of a dead mouse but also extend the lifespan of your beloved device. So, if you’re ready to take control and become the master of your mouse, let’s dive into the world of mouse battery replacement and unlock the secrets behind keeping your mouse charged and ready for action!
- Turn off your mouse.
- Locate the battery compartment on the bottom of the mouse.
- Open the battery compartment and remove the old batteries.
- Insert new batteries, making sure to match the positive and negative ends correctly.
- Close the battery compartment.
- Turn on your mouse and test if it’s working properly.

How to Change Mouse Battery: A Step-by-Step Guide
In this article, we will provide you with a detailed guide on how to change the battery of your mouse. Whether you are using a wireless mouse or a Bluetooth mouse, the process is quite similar. By following these simple steps, you can ensure that your mouse continues to work efficiently and smoothly.
Step 1: Determine the Type of Battery
The first step in changing the battery of your mouse is to determine the type of battery it uses. Most wireless mice use either AA or AAA batteries. Some mice have a built-in rechargeable battery that can be charged using a USB cable. Check the user manual or the manufacturer’s website to find out the specific type of battery used by your mouse.
Once you have identified the type of battery, you can proceed to the next step.
Step 2: Locate the Battery Compartment
Next, you need to locate the battery compartment of your mouse. In most cases, the battery compartment is located on the underside of the mouse. It is usually secured with a small latch or a sliding panel. Use your fingers or a small tool to open the compartment.
If you are unsure about the exact location of the battery compartment, refer to the user manual or the manufacturer’s website for detailed instructions.
Step 3: Remove the Old Battery
Once you have opened the battery compartment, you will see the old battery inside. Carefully remove the old battery by gently pushing it out or lifting it using your fingers. Make sure to properly dispose of the old battery according to the local regulations for battery disposal.
If the battery is rechargeable, you may need to disconnect it from the mouse before removing it. Refer to the user manual for specific instructions on how to remove the rechargeable battery.
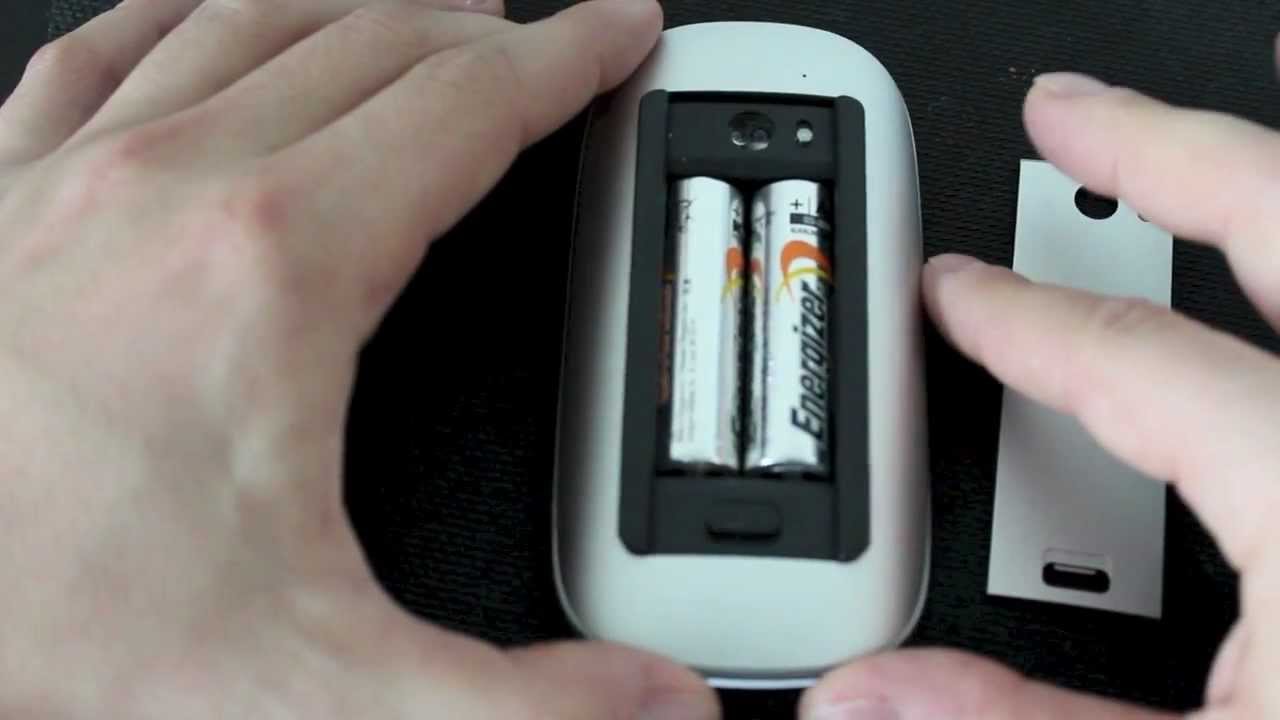
Step 4: Insert the New Battery
Now it’s time to insert the new battery. Take the new battery and place it into the battery compartment, making sure to align the positive (+) and negative (-) ends correctly. The correct orientation is usually indicated inside the battery compartment.
If you are using a rechargeable battery, reconnect it to the mouse after inserting it into the compartment.
Step 5: Close the Battery Compartment
Once the new battery is securely in place, close the battery compartment by sliding the panel or securing the latch. Make sure it is properly closed to prevent the battery from falling out.
If the battery compartment has a lock or a screw, make sure to tighten it to ensure a secure fit.
Step 6: Test the Mouse
Finally, test your mouse to ensure that the new battery is working properly. Turn on the mouse and move it around to see if it responds correctly. If the mouse does not work, double-check the battery orientation and make sure it is inserted correctly.
If the mouse still does not work, try using a different battery or consult the user manual for troubleshooting tips.
Step 7: Enjoy Your Mouse
With the new battery in place, you can now enjoy using your mouse without any interruptions. Remember to keep a spare battery on hand so that you can easily replace it when needed.
Changing the battery of your mouse is a simple task that can be done in just a few minutes. By following these steps, you can ensure that your mouse continues to function optimally and provides you with a smooth and precise cursor movement.
Frequently Asked Questions
In this section, we provide answers to some of the commonly asked questions regarding how to change the mouse battery.
Question 1: How do I know when to change the battery in my mouse?
Answer: Most wireless mice have a low battery indicator light that will flash or change color when the battery is running low. Additionally, you may notice a decrease in responsiveness or erratic cursor movement when the battery is dying. It’s a good idea to keep spare batteries on hand to avoid any disruption in your work.
Question 2: What type of battery does my mouse use?
Answer: The type of battery your mouse uses depends on the model. Most wireless mice use either AA or AAA batteries. To determine the type of battery your mouse requires, check the user manual or look for the battery compartment on the underside of the mouse. The compartment usually has markings indicating the battery type.
Question 3: How do I open the battery compartment of my mouse?
Answer: To open the battery compartment of your mouse, flip the mouse over and locate the battery cover. Some mice have a sliding cover, while others have a latch or button that needs to be pressed. Once you have located the battery cover, follow the instructions provided in the user manual or on the mouse itself to open it. Be careful not to use excessive force, as you could damage the cover or the mouse.
Question 4: How do I remove the old battery from my mouse?
Answer: After opening the battery compartment, you will see the old battery inside. To remove it, gently push on one end of the battery until it pops out. If the battery is stuck, you can use a small, non-metallic object like a pen cap or a plastic toothpick to help push it out. Be cautious not to use anything sharp or metallic that could damage the battery or the contacts inside the compartment.
Question 5: How do I insert the new battery into my mouse?
Answer: To insert the new battery, make sure you have the correct type as specified in the user manual or on the mouse itself. Align the positive and negative terminals of the battery with the corresponding markings inside the battery compartment. Gently push the battery into the compartment until it is securely in place. Close the battery cover and ensure it is properly sealed to prevent any accidental dislodging of the battery during use.
Taking the time to change your mouse battery regularly can not only prolong the lifespan of your device but also enhance its performance. A fully charged battery ensures smooth and accurate cursor movements, allowing you to navigate your computer with ease. So, next time you notice your mouse behaving sluggishly or experiencing frequent disconnects, don’t hesitate to check the battery and give it a fresh power source. By following these simple steps, you can take control of your mouse’s power needs and continue to enjoy seamless computing for hours on end.

