Are you finding it difficult to adjust to the new mouse scroll direction in Windows 11? Don’t worry, you’re not alone! Many users are facing the same challenge after upgrading to this latest version of Microsoft’s operating system. In this guide, we will walk you through the step-by-step process of changing the mouse scroll direction in Windows 11, ensuring that you regain control and navigate your system with ease. So, whether you’re a seasoned Windows user or new to the platform, sit back, relax, and let us show you how to make this adjustment in no time!
Imagine this scenario: you’re happily scrolling through a document or a webpage, only to realize that the mouse scroll direction in Windows 11 is the opposite of what you’re accustomed to. It can be frustrating and disrupt your workflow, but fear not! We have the solution you need. In this comprehensive guide, we will explain the exact steps required to change the mouse scroll direction in Windows 11, ensuring that your user experience remains smooth and intuitive. So, let’s dive in and discover how to make this adjustment effortlessly, allowing you to navigate your Windows 11 system with confidence and ease.
To change the mouse scroll direction in Windows 11, follow these steps:
- Click on the Start button and select Settings.
- In the Settings menu, click on Devices.
- Click on Mouse in the left sidebar.
- Scroll down and click on Additional mouse options.
- In the Mouse Properties window, click on the Wheel tab.
- Under the Vertical Scrolling section, check or uncheck the “Flip scrolling direction” option depending on your preference.
- Click Apply and then OK to save the changes.
How to Change Mouse Scroll Direction in Windows 11
Welcome to this step-by-step guide on how to change the mouse scroll direction in Windows 11. Whether you prefer a traditional or a reversed scroll direction, Windows 11 allows you to customize this setting according to your personal preference. Follow the instructions below to make the necessary changes and enjoy a more comfortable scrolling experience on your Windows 11 device.
Step 1: Access the Windows Settings
To change the mouse scroll direction, start by accessing the Windows Settings. You can do this by clicking on the Start button in the bottom left corner of your screen, and then clicking on the gear icon labeled “Settings”. Alternatively, you can press the Windows key + I on your keyboard to open the Settings directly.
Once the Settings app is open, you will see various categories on the left-hand side. Click on the “Devices” category, and then select the “Mouse” option from the menu on the right.
Step 2: Customize Mouse Settings
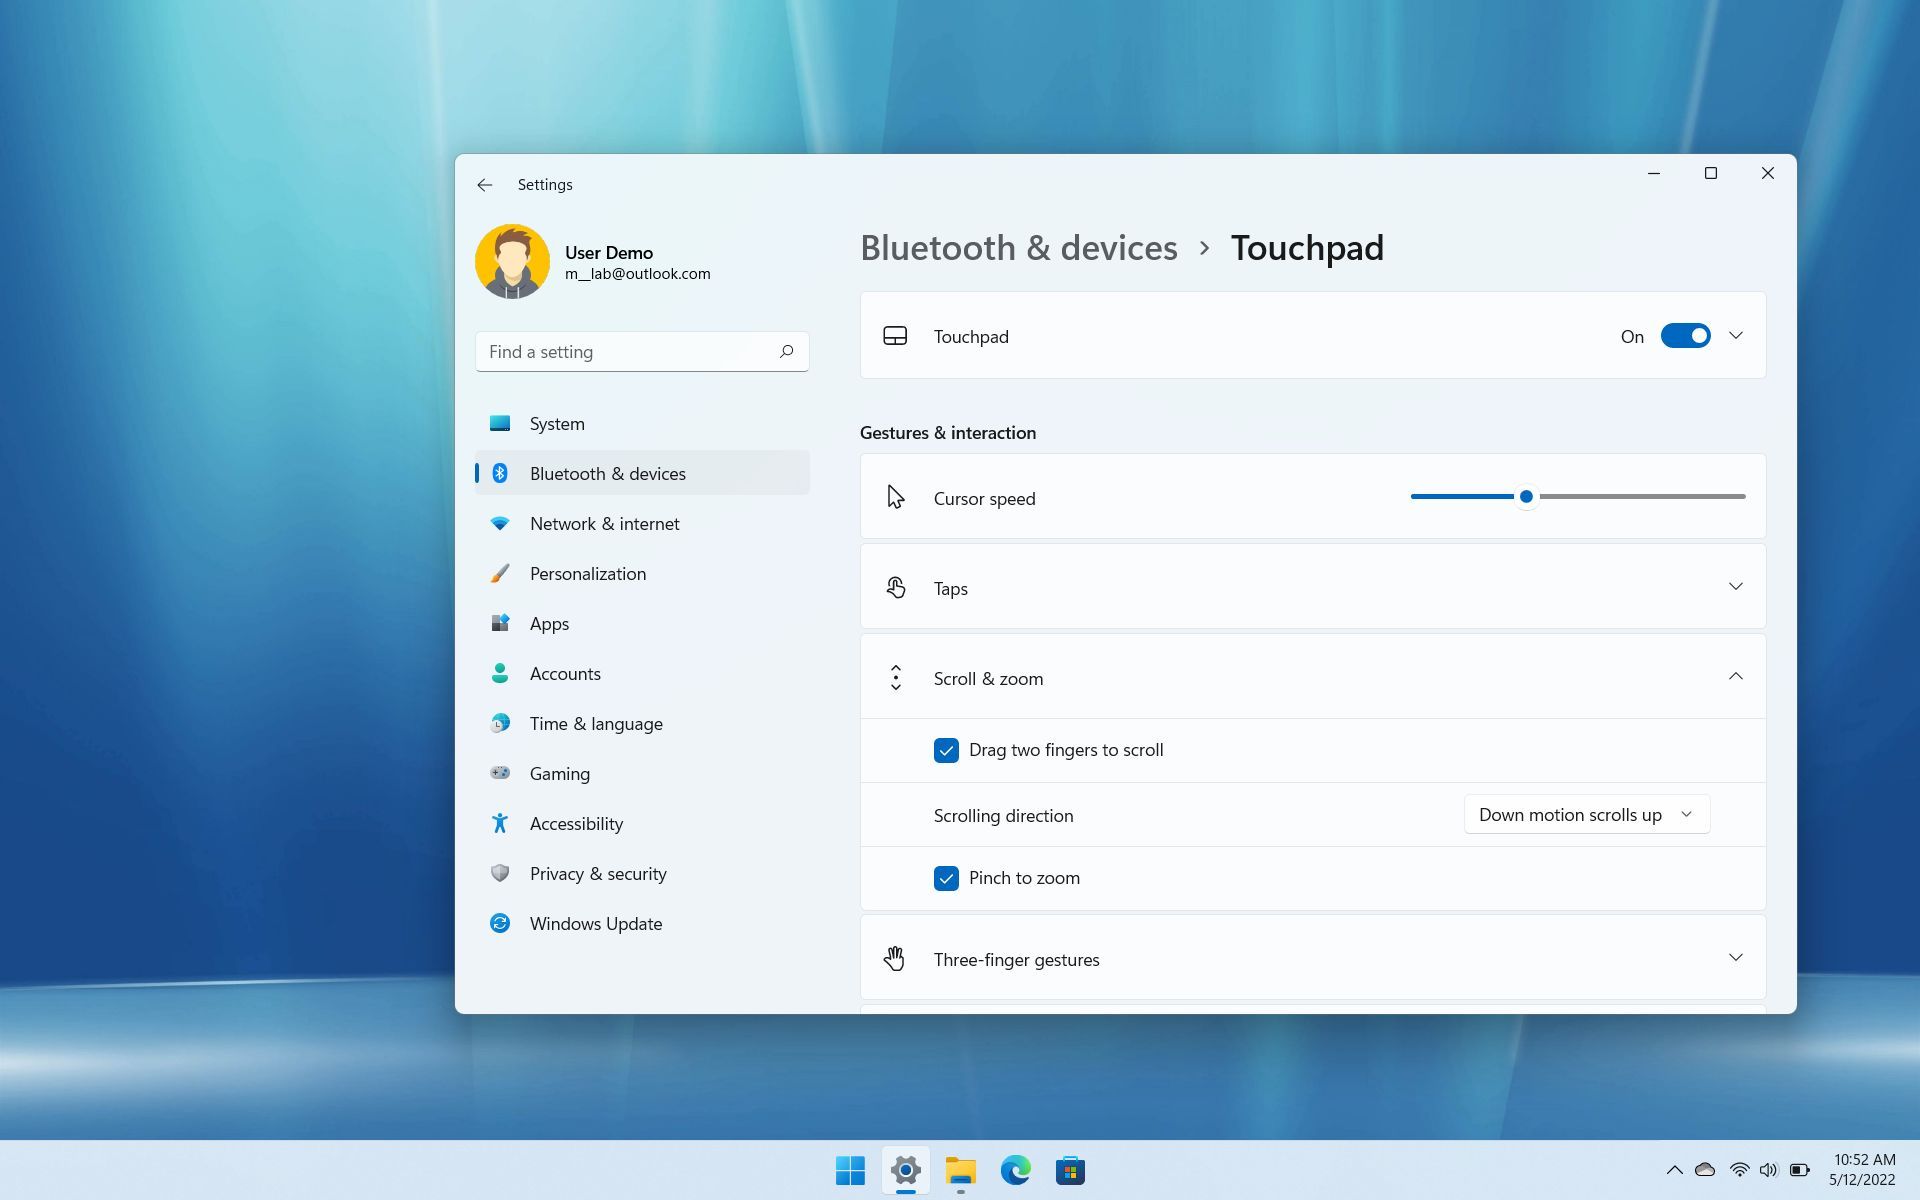
Within the Mouse settings, you will find a variety of options to customize your mouse behavior. Look for the section labeled “Scrolling direction” or “Scrolling options”. The exact wording may vary depending on your device and Windows 11 version.
In this section, you will typically see a checkbox or a drop-down menu to control the scroll direction. If you want to reverse the scroll direction, check the box or select the appropriate option that indicates reversing or flipping the scroll direction. If you prefer the traditional scroll direction, leave the box unchecked or select the default option.
Step 3: Apply the Changes
After you have made the desired changes to the mouse scroll direction, click on the “Apply” or “Save” button to save the settings. In some cases, you may need to restart your device for the changes to take effect.
Once you have applied the changes, test the mouse scroll direction by scrolling up and down on a webpage or a document. The scroll direction should now be according to your preference.
Step 4: Fine-Tuning the Scroll Settings (Optional)
If you find that the scroll speed or sensitivity is not to your liking, you can further customize these settings within the Mouse settings. Look for options such as “Scroll speed” or “Scroll sensitivity” and adjust them according to your preference.
Experiment with different settings until you find the scroll behavior that suits you best. Remember to click on “Apply” or “Save” after making any changes, and test the scroll functionality to ensure your adjustments have been successfully applied.
Step 5: Reverting to Default Settings (Optional)
If, at any point, you wish to revert to the default mouse scroll direction settings, simply return to the Mouse settings as described in Step 1. Look for an option that allows you to reset or restore the default settings. Click on this option, confirm your selection if prompted, and the scroll direction will be reset to the default configuration.
Keep in mind that the exact steps and options may vary slightly depending on your device and Windows 11 version, but the overall process should be similar to the one described here.
Step 6: Additional Mouse Customization (Optional)
Windows 11 offers various other customization options for your mouse, such as adjusting the pointer speed, enabling or disabling mouse gestures, and configuring button assignments. Feel free to explore these settings within the Mouse settings to further enhance your mouse experience.
Remember to experiment with different settings and find the configuration that suits your needs and preferences. Enjoy the improved mouse scroll direction and tailor your Windows 11 experience to your liking.
Frequently Asked Questions
Welcome to our FAQ section where we provide answers to commonly asked questions about changing the mouse scroll direction in Windows 11. If you are looking to customize your scrolling experience on the latest version of Windows, you’ve come to the right place.
Question 1: How can I change the mouse scroll direction in Windows 11?
To change the mouse scroll direction in Windows 11, follow these steps:
1. Open the Start menu and click on “Settings”.
2. In the Settings window, click on “Devices” and then select “Mouse” from the left-hand menu.
3. Under the “Mouse” settings, scroll down to find the “Scrolling direction” option.
4. To reverse the scroll direction, toggle the switch next to “Reverse scrolling direction”.
5. Close the Settings window, and your mouse scroll direction will be changed according to your preference.
Question 2: Can I customize the scroll direction for specific applications in Windows 11?
Yes, you can customize the scroll direction for specific applications in Windows 11. Follow these steps:
1. Open the Start menu and click on “Settings”.
2. In the Settings window, click on “Devices” and then select “Mouse” from the left-hand menu.
3. Scroll down to find the “Advanced mouse settings” option and click on it.
4. In the Advanced settings, click on “Additional mouse options”.
5. In the Mouse Properties window, go to the “Wheel” tab.
6. Check the box next to “Use Microsoft Office-compatible scroll only” and click on “OK”.
Now, the scroll direction will be customized for Microsoft Office applications while the overall scroll direction remains unchanged for other applications.
Question 3: Is it possible to adjust the scroll speed in Windows 11?
Yes, you can adjust the scroll speed in Windows 11 by following these steps:
1. Open the Start menu, click on “Settings”, and select “Devices”.
2. In the Devices window, choose “Mouse” from the left-hand menu.
3. Scroll down to find the “Scrolling speed” option.
4. Drag the slider to the left to decrease the scroll speed or to the right to increase it.
5. Close the Settings window, and the scroll speed of your mouse will be adjusted accordingly.
Question 4: Can I revert the changes and restore the default scroll direction in Windows 11?
Yes, you can revert the changes and restore the default scroll direction in Windows 11. Here’s how:
1. Open the Start menu, click on “Settings”, and select “Devices”.
2. In the Devices window, choose “Mouse” from the left-hand menu.
3. Scroll down to find the “Scrolling direction” option.
4. Toggle off the switch next to “Reverse scrolling direction”.
5. Close the Settings window, and the scroll direction will be restored to the default setting.
Question 5: Are there any third-party software options available to change the mouse scroll direction in Windows 11?
Yes, there are third-party software options available to change the mouse scroll direction in Windows 11. These software programs offer additional customization features beyond the default Windows settings. Some popular options include X-Mouse Button Control, AutoHotkey, and WizMouse. However, it’s important to note that using third-party software may require additional setup and compatibility checks with your specific mouse model.
Please ensure to download and install third-party software from trusted sources and follow the provided instructions carefully to avoid any potential issues.
How to Reverse Mouse Scrolling Direction In Windows 11
In conclusion, changing the mouse scroll direction in Windows 11 is a simple yet powerful way to customize your computing experience. By following the step-by-step instructions provided in this guide, you can easily switch between the traditional scroll direction and the natural scroll direction. Whether you prefer the familiarity of the old scroll direction or the intuitive feel of the new one, Windows 11 gives you the flexibility to choose what works best for you.
Remember, adapting to a new scroll direction may take some time and practice, but once you get the hang of it, you’ll be able to navigate through documents, web pages, and other content with ease. So don’t be afraid to experiment and find the scroll direction that suits your needs and preferences. Embrace the power of customization and make your Windows 11 experience truly your own!

