In today’s increasingly digital world, technology has become an integral part of our daily lives. From smartphones to laptops, we rely on these devices to stay connected, be productive, and navigate the vast realm of information at our fingertips. One such device that has revolutionized the way we interact with our computers is the Apple Mouse. With its sleek design and advanced functionalities, this wireless accessory offers a seamless and intuitive experience for Mac users. However, for those who are new to the Apple ecosystem or simply unfamiliar with the pairing process, setting up the Apple Mouse can seem like a daunting task. But fear not, as this comprehensive guide will walk you through the steps of pairing your Apple Mouse with your Mac, ensuring you’ll be clicking and scrolling in no time.
The first step in pairing your Apple Mouse is to ensure that your Mac is compatible with the device. Most Mac models released after 2012 are equipped with Bluetooth technology, which is required for connecting the mouse wirelessly. Once you’ve confirmed compatibility, the next step is to turn on your Apple Mouse by pressing the power button located on the bottom of the device. With the mouse powered on, navigate to the Apple menu on your Mac and select “System Preferences.” From there, click on the “Bluetooth” icon and make sure that Bluetooth is turned on. Your Mac will then scan for nearby Bluetooth devices, and once it discovers your Apple Mouse, click on it to initiate the pairing process. With a few simple clicks, your Apple Mouse will be successfully paired with your Mac, and you’ll be ready to take advantage of its seamless navigation and precise tracking capabilities. So, let’s dive in and get your Apple Mouse up and running, unlocking a world of productivity and convenience at your fingertips.
How to Pair Apple Mouse:
- Turn on your Apple mouse by sliding the power switch on the bottom.
- Go to the Bluetooth settings on your device.
- Make sure Bluetooth is turned on.
- Select your Apple mouse from the list of available devices.
- Follow any on-screen prompts to complete the pairing process.
How to Pair Apple Mouse
In this article, we will provide you with step-by-step instructions on how to pair your Apple Mouse with your computer. Whether you are using a Mac or a PC, the pairing process is straightforward and can be completed in just a few minutes. Follow these instructions to connect your Apple Mouse wirelessly and get ready to enjoy its seamless functionality.
Step 1: Prepare Your Apple Mouse
Before you begin the pairing process, ensure that your Apple Mouse is fully charged or has fresh batteries. This will prevent any interruptions during the pairing process. If your mouse is rechargeable, connect it to your computer or a power source using the provided cable. If it uses batteries, insert the required batteries into the mouse.
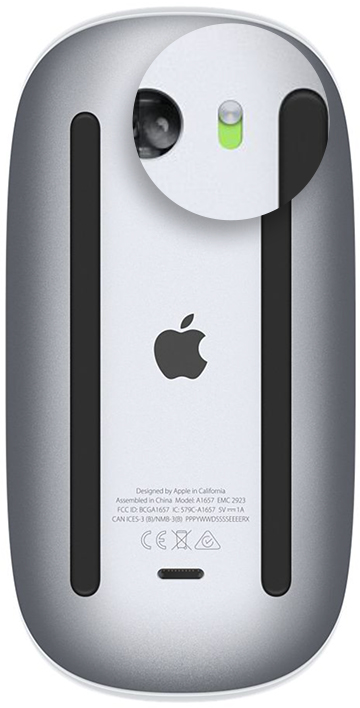
Once your Apple Mouse is ready, turn it on by pressing the power button located on the bottom of the mouse. You will see a small LED light indicating that the mouse is powered on and ready for pairing.
Step 2: Enable Bluetooth on Your Computer
To pair your Apple Mouse with your computer, you need to ensure that Bluetooth is enabled. If you are using a Mac, click on the Apple menu in the top-left corner of your screen and select “System Preferences.” In the System Preferences window, click on the “Bluetooth” icon. Check the box next to “On” to enable Bluetooth.
If you are using a PC, go to the Windows Start menu and click on the gear icon to open the Settings app. In the Settings window, select “Devices” and then click on “Bluetooth & other devices” in the left-hand menu. Toggle the Bluetooth switch to the “On” position to enable Bluetooth.
Step 3: Pair Your Apple Mouse
Once Bluetooth is enabled on your computer, it’s time to pair your Apple Mouse. On your Mac, in the Bluetooth settings, you will see a list of available devices. Look for your Apple Mouse in the list and click on it to select it. Click on the “Pair” button next to the mouse’s name, and your Mac will establish a connection with the mouse.
If you are using a PC, in the Bluetooth & other devices settings, click on the “Add Bluetooth or other device” button. In the Add a device window, select “Bluetooth” and wait for your computer to detect the Apple Mouse. Once detected, click on the mouse’s name and then click on the “Pair” button to establish a connection with your PC.
Step 4: Test Your Apple Mouse
After pairing your Apple Mouse with your computer, it’s essential to ensure that it is functioning correctly. Move your mouse around to verify that the cursor on your screen responds accordingly. Test the buttons and scroll wheel to ensure they are working as expected.
If you encounter any issues with the mouse’s functionality, try restarting your computer or resetting the mouse. Refer to the user manual or Apple’s support website for detailed instructions on troubleshooting and resolving any problems.
Step 5: Customize Mouse Settings (Optional)
Once your Apple Mouse is successfully paired and functioning correctly, you may want to customize its settings to suit your preferences. On a Mac, you can access the mouse settings by going to System Preferences, selecting “Mouse,” and adjusting the various options available.
For PC users, open the Settings app, click on “Devices,” and select “Mouse” from the left-hand menu. Here, you can customize the mouse buttons, scroll speed, and other settings to enhance your user experience.
Step 6: Enjoy Your Apple Mouse
Congratulations! You have successfully paired your Apple Mouse with your computer. Now you can enjoy the seamless and precise control that the Apple Mouse offers. Whether you are working, browsing the web, or enjoying multimedia content, your Apple Mouse will enhance your productivity and overall user experience.
Remember to keep your mouse charged or replace the batteries as needed to ensure uninterrupted functionality. Regularly clean the mouse to remove any dirt or debris that may accumulate over time, as this can affect its performance.
Frequently Asked Questions
Here are some commonly asked questions about how to pair an Apple mouse.
How do I pair my Apple mouse with my Mac?
To pair your Apple mouse with your Mac, follow these steps:
1. Make sure that your Mac is turned on and Bluetooth is enabled.
2. Go to the Apple menu and select “System Preferences.”
3. Click on “Bluetooth.”
4. Turn on the mouse and put it in pairing mode. This can usually be done by pressing and holding the power button until the LED light starts flashing.
5. On your Mac, you should see the Apple mouse listed under “Devices.” Click on it to start the pairing process.
6. Follow any on-screen instructions to complete the pairing process.
7. Once the pairing is successful, you should be able to use your Apple mouse with your Mac.
Can I pair an Apple mouse with an iPad or iPhone?
No, Apple mice are designed to work specifically with Mac computers and do not have support for pairing with iPads or iPhones. However, you can use a Bluetooth mouse that is compatible with iOS devices if you need a mouse for your iPad or iPhone.
How do I know if my Apple mouse is already paired with my Mac?
To check if your Apple mouse is already paired with your Mac, follow these steps:
1. Go to the Apple menu and select “System Preferences.”
2. Click on “Bluetooth.”
3. Look for the Apple mouse in the list of paired devices.
4. If the mouse is listed and connected, it is already paired with your Mac.
5. If the mouse is not listed, or it is listed but not connected, you may need to pair it again following the steps mentioned earlier.
Can I pair multiple Apple mice with one Mac?
Yes, you can pair multiple Apple mice with one Mac. However, keep in mind that each mouse will be treated as a separate input device, and you will need to switch between them if you want to use a different mouse. To pair multiple Apple mice, follow the same steps mentioned earlier for pairing a single mouse.
What should I do if my Apple mouse is not pairing with my Mac?
If your Apple mouse is not pairing with your Mac, try the following troubleshooting steps:
1. Make sure that your Mac’s Bluetooth is turned on and functioning properly.
2. Restart your Mac and try pairing the mouse again.
3. Check the battery level of your mouse and replace the batteries if necessary.
4. Reset the Bluetooth module on your Mac by going to the Apple menu, selecting “System Preferences,” clicking on “Bluetooth,” and then clicking on the “X” next to the mouse to remove it. Restart your Mac and try pairing the mouse again.
5. If none of the above steps work, contact Apple Support for further assistance.
How to Connect Apple Magic Mouse to any Mac
In conclusion, mastering the art of pairing your Apple mouse is an essential skill for any user, whether you’re a seasoned tech enthusiast or a novice navigating the digital landscape. By following the simple steps outlined in this guide, you can ensure a seamless connection between your mouse and device, allowing you to enhance your productivity and streamline your workflow.
Remember, the key to successful pairing lies in patience and attention to detail. Take the time to familiarize yourself with the specific instructions for your Apple mouse model, and don’t hesitate to reach out to Apple support if you encounter any difficulties. With a little perseverance, you’ll be navigating your digital world with ease, enjoying the precision and convenience that an Apple mouse brings to your fingertips. So, go ahead, dive into the pairing process, and unlock a world of limitless possibilities. Happy clicking!

